Drain users from an AOS – AX 2012

Applies To: Microsoft Dynamics AX 2012 R2, Microsoft Dynamics AX 2012 Feature Pack, Microsoft Dynamics AX 2012

This topic describes how to close client sessions that are connected to an instance of Application Object Server (AOS) for Microsoft Dynamics AX. When you close client sessions without force, you are said to drain users. Administrators drain users from an AOS instance before they perform maintenance on the server or take it offline.


Important

The following procedure requires that you click the Reject new clients button in Microsoft Dynamics AX. After you click this button, you must not close your client. If you close your client before you click the Accept new clients button, you cannot open a new client session unless you restart the AOS instance by using the Windows Services Management console, or unless you reset Status of the SysServerSessions table in Microsoft SQL Server  to a value of 1.


  1. Click System administration > Common > Users > Online users.

  2. On the Server instances tab, select the AOS instance that you want to perform maintenance on.

  3. Click Reject new clients.

  4. When you are prompted, click OK to stop the AOS instance from accepting new client connections.

    After 5 minutes, all users receive a message informing them that they must save their work, because the administrator is shutting down the AOS instance. No new client connections are accepted during this time. The server forces client sessions to close after they have been idle for 2 minutes. Client sessions for administrators are never closed. When the number of clients that are connected to the AOS instance is displayed as 0 (zero), you can perform maintenance on the server.

  5. After you have finished performing maintenance on the server, click Accept new clients or restart the AOS instance.

How to: Call an AIF Web Service from C# to Create a Sales Order - Sample Code

using System;

using System.Collections.Generic;

using System.Linq;

using System.Text;

using ConsumeSalesOrderService.SalesOrder;

// Add a using statement for the service reference.

using System.Collections;

namespace ConsumeSalesOrderService

{

    class Program

    {

        static void Main(string[] args)

        {

            // Instantiate an instance of the service client class.

            SalesOrderService proxy = new SalesOrderService();

            // Create an instance of the document class.

            AxdSalesOrder salesOrder = new AxdSalesOrder();

            // Create instances of the entities that are used in the service and

            // set the needed fields on those entities.

            AxdEntity_SalesTable salesTable = new AxdEntity_SalesTable();

            salesTable.CurrencyCode = "USD";

            salesTable.CustAccount = "1101";

            salesTable.DeliveryDate = Convert.ToDateTime("2/14/2010");

            salesTable.Payment = "N060";

            salesTable.PurchOrderFormNum = "PO";

            AxdEntity_SalesLine salesLine = new AxdEntity_SalesLine();

            salesLine.ItemId = "1001";

            salesLine.SalesQty = 88;

            salesLine.SalesUnit = "ea";

            AxdEntity_InventDim inventDim = new AxdEntity_InventDim();

            inventDim.configId = "HD";

            inventDim.InventColorId = "01";

            inventDim.InventSizeId = "42";

            // Add the sub-entity instances to their parent entities as an array

            // of the sub-entity type.

            salesLine.InventDim = new AxdEntity_InventDim[1] { inventDim };

            salesTable.SalesLine = new AxdEntity_SalesLine[1] { salesLine };

            salesOrder.SalesTable = new AxdEntity_SalesTable[1] { salesTable };

            try

            {

                // Call the create method on the service passing in the document.

                EntityKey[] returnedSalesOrderEntityKey = proxy.create(salesOrder);

                // The create method returns an EntityKey which contains the ID of the sales order.

                EntityKey returnedSalesOrder = (EntityKey)returnedSalesOrderEntityKey.GetValue(0);

                Console.WriteLine("The sales order created has a Sales ID of " + returnedSalesOrder.KeyData[0].Value);

                Console.ReadLine();

            }

            catch (Exception e)

            {

                Console.WriteLine(e.ToString());

                Console.ReadLine();

            }

        }

    }

}

Microsoft Dynamics AX 2012 Data Import/Export Framework standalone version for AX 2012 R2 without installing full CU7

We have recently released the new version for Microsoft Dynamics AX 2012 Data Import/Export Framework as part of Microsoft Dynamics AX 2012 R2 CU7. We received lot of requests to get the new version for AX 2012 R2 (Base R2 and/or CU1, CU6, hotfixes) without taking full CU7. To make this happen, we have released an application hotfix for DIXF which can be installed on AX 2012 R2 (Base R2 and/or CU1, CU6, hotfixes).  The hotfix does not contain the binary files for the Data Import/Export Framework. You must install the binary files for the Data Import/Export Framework by using the CU7 update installer.

Application Components

The application hotfix contains the application files for the version of the Data Import/Export Framework that was released with cumulative update 7.

Important: This hotfix does not contain the binary files for the Data Import/Export Framework. You must install the binary files for the Data Import/Export Framework by using the CU7 update installer.

Download:

Application files for the Data Import/Export Framework, cumulative update 7 version

Instructions:

To install the Data Import/Export Framework:

  1. Install this hotfix using the installer that it ships with.
  2. Complete the software update checklist.

Binary Components

You must install the binary files for the Data Import/Export Framework by using the CU7 update installer.

Download:

Microsoft Dynamics AX 2012 R2 Cumulative Update 7 (KB2885603 )

Instructions:

Install Data import export framework Client, AOS and Service components.

http://technet.microsoft.com/EN-US/library/hh538446.aspx%23InstallCU7

CU 7: Install the Data Import/Export Framework (binary)


As of cumulative update 7, you can install the Data Import/Export Framework from the update installer. For an overview of the Data Import/Export Framework, see Data import/export framework user guide ( (DIXF, DMF).

Caution

If you have previously installed the Data Import/Export Framework from InformationSource, you must fully uninstall it before installing again with cumulative update 7 for Microsoft Dynamics AX 2012 R2. This includes removing all binary files by using Add/Remove Programs, and the uninstalling Data Import/Export Framework model. For more information see How to: Remove (Uninstall) a Model.

  1. Browse to the location where you extracted the files for the update, and then double-click AxUpdate.exe.
  2. On the Welcome to Microsoft Dynamics AX Update Setup page, click Next.
  3. On the Software license terms page, review the license terms, and then click Accept and continue.
  4. On the Select packages to update page, select the components of the Data Import/Export Framework that can be installed on the local computer, and then click Next.
  5. The prerequisite validation check runs. Address any issues that the prerequisite check finds outside the installer, and then restart the validation check. When all prerequisites have been found, click Next.
  6. If you are installing on the computer that runs Microsoft SQL Server Integration Services, specify a service account and the version of SQL Server that is running. We recommend that you use the AOS service account.

–or–

If you are installing on the AOS computer, specify the name of the server that is running SQL Server Integration Services.

  1. On the Review updates to be installed page, click Next.
  2. On the Ready to install page, review the summary, select the Automatically restart the AOS instances after installation check box, and then click Install.
  3. After the installation is completed, verify that the updates were installed successfully, and then exit the wizard.


Imparted from here

Consume an AX AIF Document Service from .NET

Imparted from here

This article appears in the Third Party Products and Tools section. Articles in this section are for the members only and must not be used to promote or advertise products in any way, shape or form. Please report any spam or advertising.

Introduction

This article shows how a .NET client (in our case Windows Client) can consume an AX WCF document service. For this purpose, the service will be hosted on the AOS (Application Object Server) instead of IIS.

Scope

We take the class room (course rooms) administration module as an example. We want to expose a (document) service which makes it possible for external clients to exchange data (CRUD-operations) with AX.

Steps

The remainder of the document explains the different steps to meet our goals. This post assumes that the reader has some experience with the AX AIF (Application Integration Framework) which means that next steps briefly explains the creation, deployment and consumation of an AX document service.

Step 1: Create a document query

Each document service is based on a document query stored in the AOT (Application Object Tree) in AX. This document query holds the appropriate data objects which will be exposed by the service. The datasources of the document query will be exposed by the (WCF) service which will contain the appropriate XML message schema.

Step 2: Create a document service

The wizard takes the created document query (from the previous step) as input parameter and will create a corresponding service class (details omitted). This service class hosts the different methods to invoke CRUD (Create; Read; Update; Delete) operations on the datasource (in our case Course Rooms).

Step 3: Check generated service project

The service wizard created a service project. Besides the service itself, the project contains the service query, the service document class, and the data classes which hold the actual data. What’s interesting is that the service wizard also created a job: GenerateXSDSchema_AxdEMNU_AxdHRMCourse which provides the XML that will be sent over the wire to the consuming client. When you execute the job, you will get the corresponding XML file, as shown below:

Step 4: Expose the document service as a WCF WebService

Create an (enhanced) inbound port for the service (use inbound ports for messages which originate from within AX and should be consumed by external clients). In our demo case, we will expose the service as a tcp-ip service, which will be consumable by external clients from within the scope of the intranet. (If the service should be consumable from the internet, we should choose the Http adapter instead).

Step 5: Select the appropriate service operations

Once you have created an integration port, you must select the service operations which can be invoked by the consuming client.

Step 6: Consume the exposed document service by an external (.NET) client

The service can be consumed by an external client (in our case, a .NET winforms application) … but could be any other type of application … Just below, I briefly explain the interaction code within the .NET client (code executed when the user selects the load or save button). In our demo case, we expose the find, create, update & delete methods.

Step 6.1: .NET Winforms client

The service will be consumed by a simple (C#) .NET client. The client will load the data into a datagrid, make changes to the data (CRUD operations) and submit those changes to AX.

Step 6.2: Load data in .NET client

When the users “clicks” the “Load” button, next will happen:

  • Set query criteria, in our case we will return all course rooms.
  • Set the company from which data will be loaded.
  • Call the repository GetCourseRooms() method which returns all rooms from AX.
Step 6.3: Save the changes to AX

When the user “clicks” the “Save” button, next will happen:

  • Apply last changes to the current dataset (.NET DataSet holds the AX records)
  • Get all added, modified & deleted rows
  • Call the repository SaveCourseRooms() method which will update the data to AX.
.NET Data Repository
Implementing the "find" method in the repository class
Implementing the "create, update & delete" method in the repository class

Dynamics AX 2009 Workflow does not working

I have faced a problem today at my work, the workflow does not working, and there not PR submitted and any incident is Pending.

I checked every thing and restart AOS Service  but my Issue is not fixed, so I checked Windows event log on server that host Workflow services and I got the bellow error.


Session log on for Microsoft Dynamics failed.

Dynamics Adapter LogonAs failed.

Microsoft.Dynamics.Framework.BusinessConnector.Session.Exceptions.FatalSessionException
   at Microsoft.Dynamics.Framework.BusinessConnector.Session.DynamicsSession.HandleException(String message, Exception exception, HandleExceptionCallback callback)
   at Microsoft.Dynamics.Framework.BusinessConnector.Session.DynamicsBase.HandleExceptionInternal(String message, Exception e)
   at Microsoft.Dynamics.Framework.BusinessConnector.Session.DynamicsAdapter.LogonAs(String user, String domain, NetworkCredential bcProxyCredentials, String company, String language, String objectServer, String configuration)
   at Microsoft.Dynamics.Framework.BusinessConnector.Session.DynamicsAdapter.Microsoft.Dynamics.Framework.BusinessConnector.Adapter.IAxaptaAdapter.LogonAs(String user, String domain, NetworkCredential bcProxyCredentials, String company, String language, String objectServer, String configuration)
   at Microsoft.Dynamics.Framework.Workflow.BusinessConnector.WorkflowSession.OnLogon(IAxaptaAdapter axaptaAdapter)
   at Microsoft.Dynamics.Framework.BusinessConnector.Session.DynamicsSession.Init(ICacheContext context)

Microsoft.Dynamics.BusinessConnectorNet.LogonFailedException
   at Microsoft.Dynamics.BusinessConnectorNet.Axapta.Logon(BC_PROXY_ACCOUNT_INFO* pBCProxyAccountInfo, String company, String language, String objectServer, String configuration)
   at Microsoft.Dynamics.BusinessConnectorNet.Axapta.LogonUsingBCProxyAccount(_SEC_WINNT_AUTH_IDENTITY_W* pImpersonatedUserAccount, NetworkCredential bcProxyCredentials, String company, String language, String objectServer, String configuration)
   at Microsoft.Dynamics.BusinessConnectorNet.Axapta.LogonAs(String user, String domain, NetworkCredential bcProxyCredentials, String company, String language, String objectServer, String configuration)
   at Microsoft.Dynamics.Framework.BusinessConnector.Session.DynamicsAdapter.LogonAs(String user, String domain, NetworkCredential bcProxyCredentials, String company, String language, String objectServer, String configuration)

Solution:

Restart IIS service on the server.

Dynamics AX 2012 R2 – Cumulative Update 7 (CU7) released

Microsoft released a new cumulative update for Microsoft Dynamics AX2012 R2, named Cumulative Update 7 (KB2885603). The version number of this release is 6.2.1000.4051.

You can download the update here.

Within this update hotfixes are included as well as some new or enhanced features. Also the prior CU’s are included. It’s good to see Microsoft continues enriching the functionality for Microsoft Dynamics AX even in cumulative updates. There was an additional focus within the next areas:

Update experience

The CU7 update experience is more metadata driven – providing users the ability to view applicable changes, perform impact analysis during install and apply them to their environments on an as-needed basis with auto code update (where possible). The new update experience will also have tighter integration between Lifecycle Services in the cloud and the on premise update installer.

Sales order potency

Create and validate price calculations for sales order items that have a potency. Price calculations are based on the active concentration levels of batch attributes.

Budget planning

  • Create an Excel worksheet template using a wizard.
  • Allocate budget amounts using ledger allocation.

Payroll

Some compliance preparation reports are added for use of the 940, 941, state wage and tax reports. Also preparation reports for VETS and OSHA are available for the US market.

It is possible to create groupings of tax codes that share the same financial data. An user can act on then as group rather than individually. The new tax groups can be used in transaction posting definitions as well.

Another nice enhancement is the functionality for updating benefits rates. A process can be run that compares the default rates to the enrolled rates for each worker and makes any necessary updates. It also provides a way for the user to designate an enrolled rate as “custom” so the update tool will ignore it when processing updates.

You can now use the Payroll cube to analyze information including earnings statements, pay statements, benefit accruals, tax history, arrears, and benefits.

HRM

You can hire or promote a worker using personnel actions. These actions enables the following features:

  • The hire action is added to an action history log for the worker
  • The option to use standard Dynamics AX Workflow before the Hire is committed
  • The option to easily add comments about the hire

Depending on the personnel action type that you use, the hire action can be routed through workflow.

You can now use the HR cube to analyze workforce demographic information, recruiting metrics, compensation, benefits, training courses, seniority, positions, jobs, employment leave, terminations, and more.

On-hand cleanup

The purpose of the On-hand entries cleanup feature is to improve the performance of the on-hand query by deleting records from the inventory on-hand table (InventSum) that are closed and associated with a tracking dimension. Entries in the table that are not associated with a tracking dimension are not deleted. The feature will especially benefit companies that handle large quantities of serialized products.

Product change

Within CU7 functionality is added to document the master data changes needed to accommodate the substitution of a component used in production, and manage the coordinated release of BOMs and routes to production. This functionality is integrated with case management where product cases are routed in this process.

Services industries

It is also good to see some improvements on project functionality:

A Microsoft Project client add-in is included in this update. It enables easy creation and editing in MS Project without requiring Project Server. It supports editing WBS for project, project quotes, and templates including task and category assignment. Additionally it enables tasks to be viewed on SharePoint Online.

Enhancements on the work breakdown structure (WBS) provides a more natural and complete editing surface for project planning, estimation, and monitoring. Several enhancements have been made to provide more effective resource scheduling and assignment. These enhancements include the following abilities:

  • Assign resources using visual, graphic-based tools
  • Form a project team by identifying project roles and competencies required for the team
  • Rationalize team and work breakdown structure assignments • Assign a percentage of a worker’s capacity to a project
  • Make group resource assignments

Also enhancements were made on intercompany project invoicing. The goal of this functionality is to make the control of cost, revenue recognition, taxes, and transfer price for intercompany project transactions in Microsoft Dynamics AX Service Industries more flexible and powerful.

Mobile experiences

Until now you could install updates for enabling functionality on mobile devices such as timesheets and expenses. Within this update this functionality is included out of the box.

Data Import Export Framework

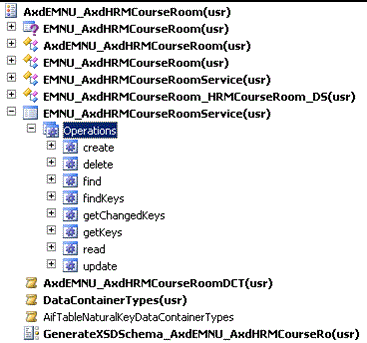
Within CU7 also the Data Import Export Framework is integrated as part of the update. Over 60 entities have been added out of the box. Some new entities are: Number sequence codes, Project contracts and Product variants.

Also the new version of this framework now supports file type XML and Excel.

You can now use a wizard to compare or copy entities from one source company to one or more companies.

Imparted from here